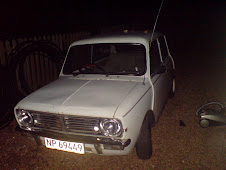
First days work, how exciting :D i figured that it would be most logical to start on her working from the ground up (you probably have a better way but this seems to work for me) so, i got her up on a jack grabbed a wheel spanner and my handy haynes manual (what a lifesave thats been!! in fact heres a link to a site where you can get one!- http://www.minimania.com/web/Item/646/invDetail.cfm or http://www.kalahari.net/books/Haynes-Restoration-Manual-Mini/657/1310853.aspx)
and off i went. Starting with checking the brakes and hub bearings, the first rear passenger wheel came off easily enough, just undo the wheel nuts slide off the wheel and remove the brake outer drum, clean out the brake dust (carefully!! you dont want to be breathing that stuff in!) and check the wear on the brake itself isnt too low, check check and check all ok there, then i moved to the front passenger, wheel off drum off cleaned out all ok.. now hub bearings, remove hub cap... ok sure...
5 minuites later i fetched my 'general purpose negotiating machine' otherwise known as a hammer and a good strong flat screwdriver, and i mean STRONG!! those caps are fitted tight so you are in for a fight, once thats off you should see a fair amount of old grease and hopefully a bearing or two a good doseing of degreaser (even the cheap ones work great so dont worry about brands here!) and a dolop of new grease over them did the trick nicely, but be warned!! the front hub has two of these sneeky little devices! so make sure you get the one at the back too, again now worries about damage so everything goes back together nice and happy.
and then i opened up the rear drivers side brake drum! and oh dear!! some one had forgotten to change the pads so the metal holding the pad had dug into the lining ot the drum itself cutting a nice big groove into the lining!! so i hauled the whole hub assembly off the car and took a trip into a nice chap just down the road from work who for a very reasonable sum (R100 or so if i remember correctly) was able to grind out the groove and fit shiney new brake linings to the brake shoes! yaay!!
unfortunately he applied slightly too much lining to the shoe and when it came to fitting the drum back over the brake assembly suprise suprise it didnt fit!! just as well they are brake pads, a little jiggling and alot of swearing later i had managed to get the drum back on the car, yes the brake was a tight fit but they will wear down quite quickly, or so im told. hey what do i know, its the first time im doing this! :D
now on to the final tyre!!
hurra... oh hmm its a little close to the top of the wheel housing! in fact i cant even fun my hand over the tyre its so close!! something must be wrong.
and there was, it took me almost 2 weeks to find out what but it would seem someone didnt line up the suspention too well, now if you dont already know the mini's suspention (well in mine atleast) consists of a fat little rubber donut (its actual name by the way) sitting atop a metal alloy trumpet (also its actual name) unfortuneately my trumpet had somehow slipped and had distroyed itself, hence there was no suspention at all on the front right hand side!! so off to mini spares and accessories in pinetown to find a replacement. just as well the trumpet had distroied itself because whn i pulled everything out i realised that the rubber cone was completely worn out too!! and where theres one worn cone... well you get the idea.
so i had to replace both front suspention cones and trumpets, but why replace when you can improve!! so in went 2 new hi-los aswell.
now i say all of this with much ease because, well its easy to say, but if you have plans on doing this yourself you need to know it much harder than you think!!! a quick read through some of the posts on the mini resourse discussion forum will give you an idea! (http://www.miniresource.com/forums/index.php?showtopic=22889) theres alot of energy stored up in those cones so you need a compression tool (m14 threded rod and 3 nuts with a peice of tube that will fit over the rod and some thick washers are the cheap option though) and even then it can be murder getting all the components apart!
the trumpets and cones have a tendency to stick together, this is a good thing seeing as they hold the car up but can be just a little frustrating when you want to replace a part with out distroying the other one!
so now she's sitting nice and level(ish - i still need to do a final adjustment to the hi-los) and looking very pretty indeed!
now i just need to get her running again.. shouldnt be too hard right ;)
stay mini :D
Subscribe to:
Post Comments (Atom)


No comments:
Post a Comment